Mommysavers

Frugal Moms Living Well for Less

  • Facebook
  • Instagram
  • Food
    • Recipes
      • 5 Ingredients or Less
      • 30 Minute Meals
      • Freezer Meals
      • Appetizers
      • Breakfast
      • Lunch
      • Dinner
      • Dessert
      • Snacks
    • Cooking Techniques
    • Leftovers and Preservation
  • Home
    • Cleaning
    • Decor and Design
    • DIY Projects
    • Money
      • Couponing
      • Personal Finance
      • Shopping Tips
    • Simple Living
  • Family
    • Fun
    • Parenting
    • Travel
  • A Better You
    • Health and Fitness
    • Lifehacks
    • Fashion
    • Motivation and Productivity
    • Entrepreneurialism
  • Holidays
    • Thanksgiving
    • Christmas
    • New Year’s Eve
    • Valentine’s Day
    • St. Patrick’s Day
    • Easter
    • Mother’s Day
    • Father’s Day
    • Halloween
  • Special Deals

Cinco de Mayo Craft: Make a Paper Bag Pinata

April 28, 2011 by Susie Chadwick 8 Comments

Cinco de Mayo Craft: Homemade Paper Bag Pinata

My preschooler and I made this fun, easy and fast homemade piñata to celebrate Cinco de Mayo.  Homemade piñatas can be messy and a lot of work, but this simple version uses a paper lunch sack!  Keep reading to see how easy it was to make this homemade paper bag pinata.

Paper Bag Pinata Supplies

  • paper lunch sack (or large paper grocery bag for a larger pinata)
  • tissue paper or crepe paper
  • scissors
  • glue stick
  • rubber band
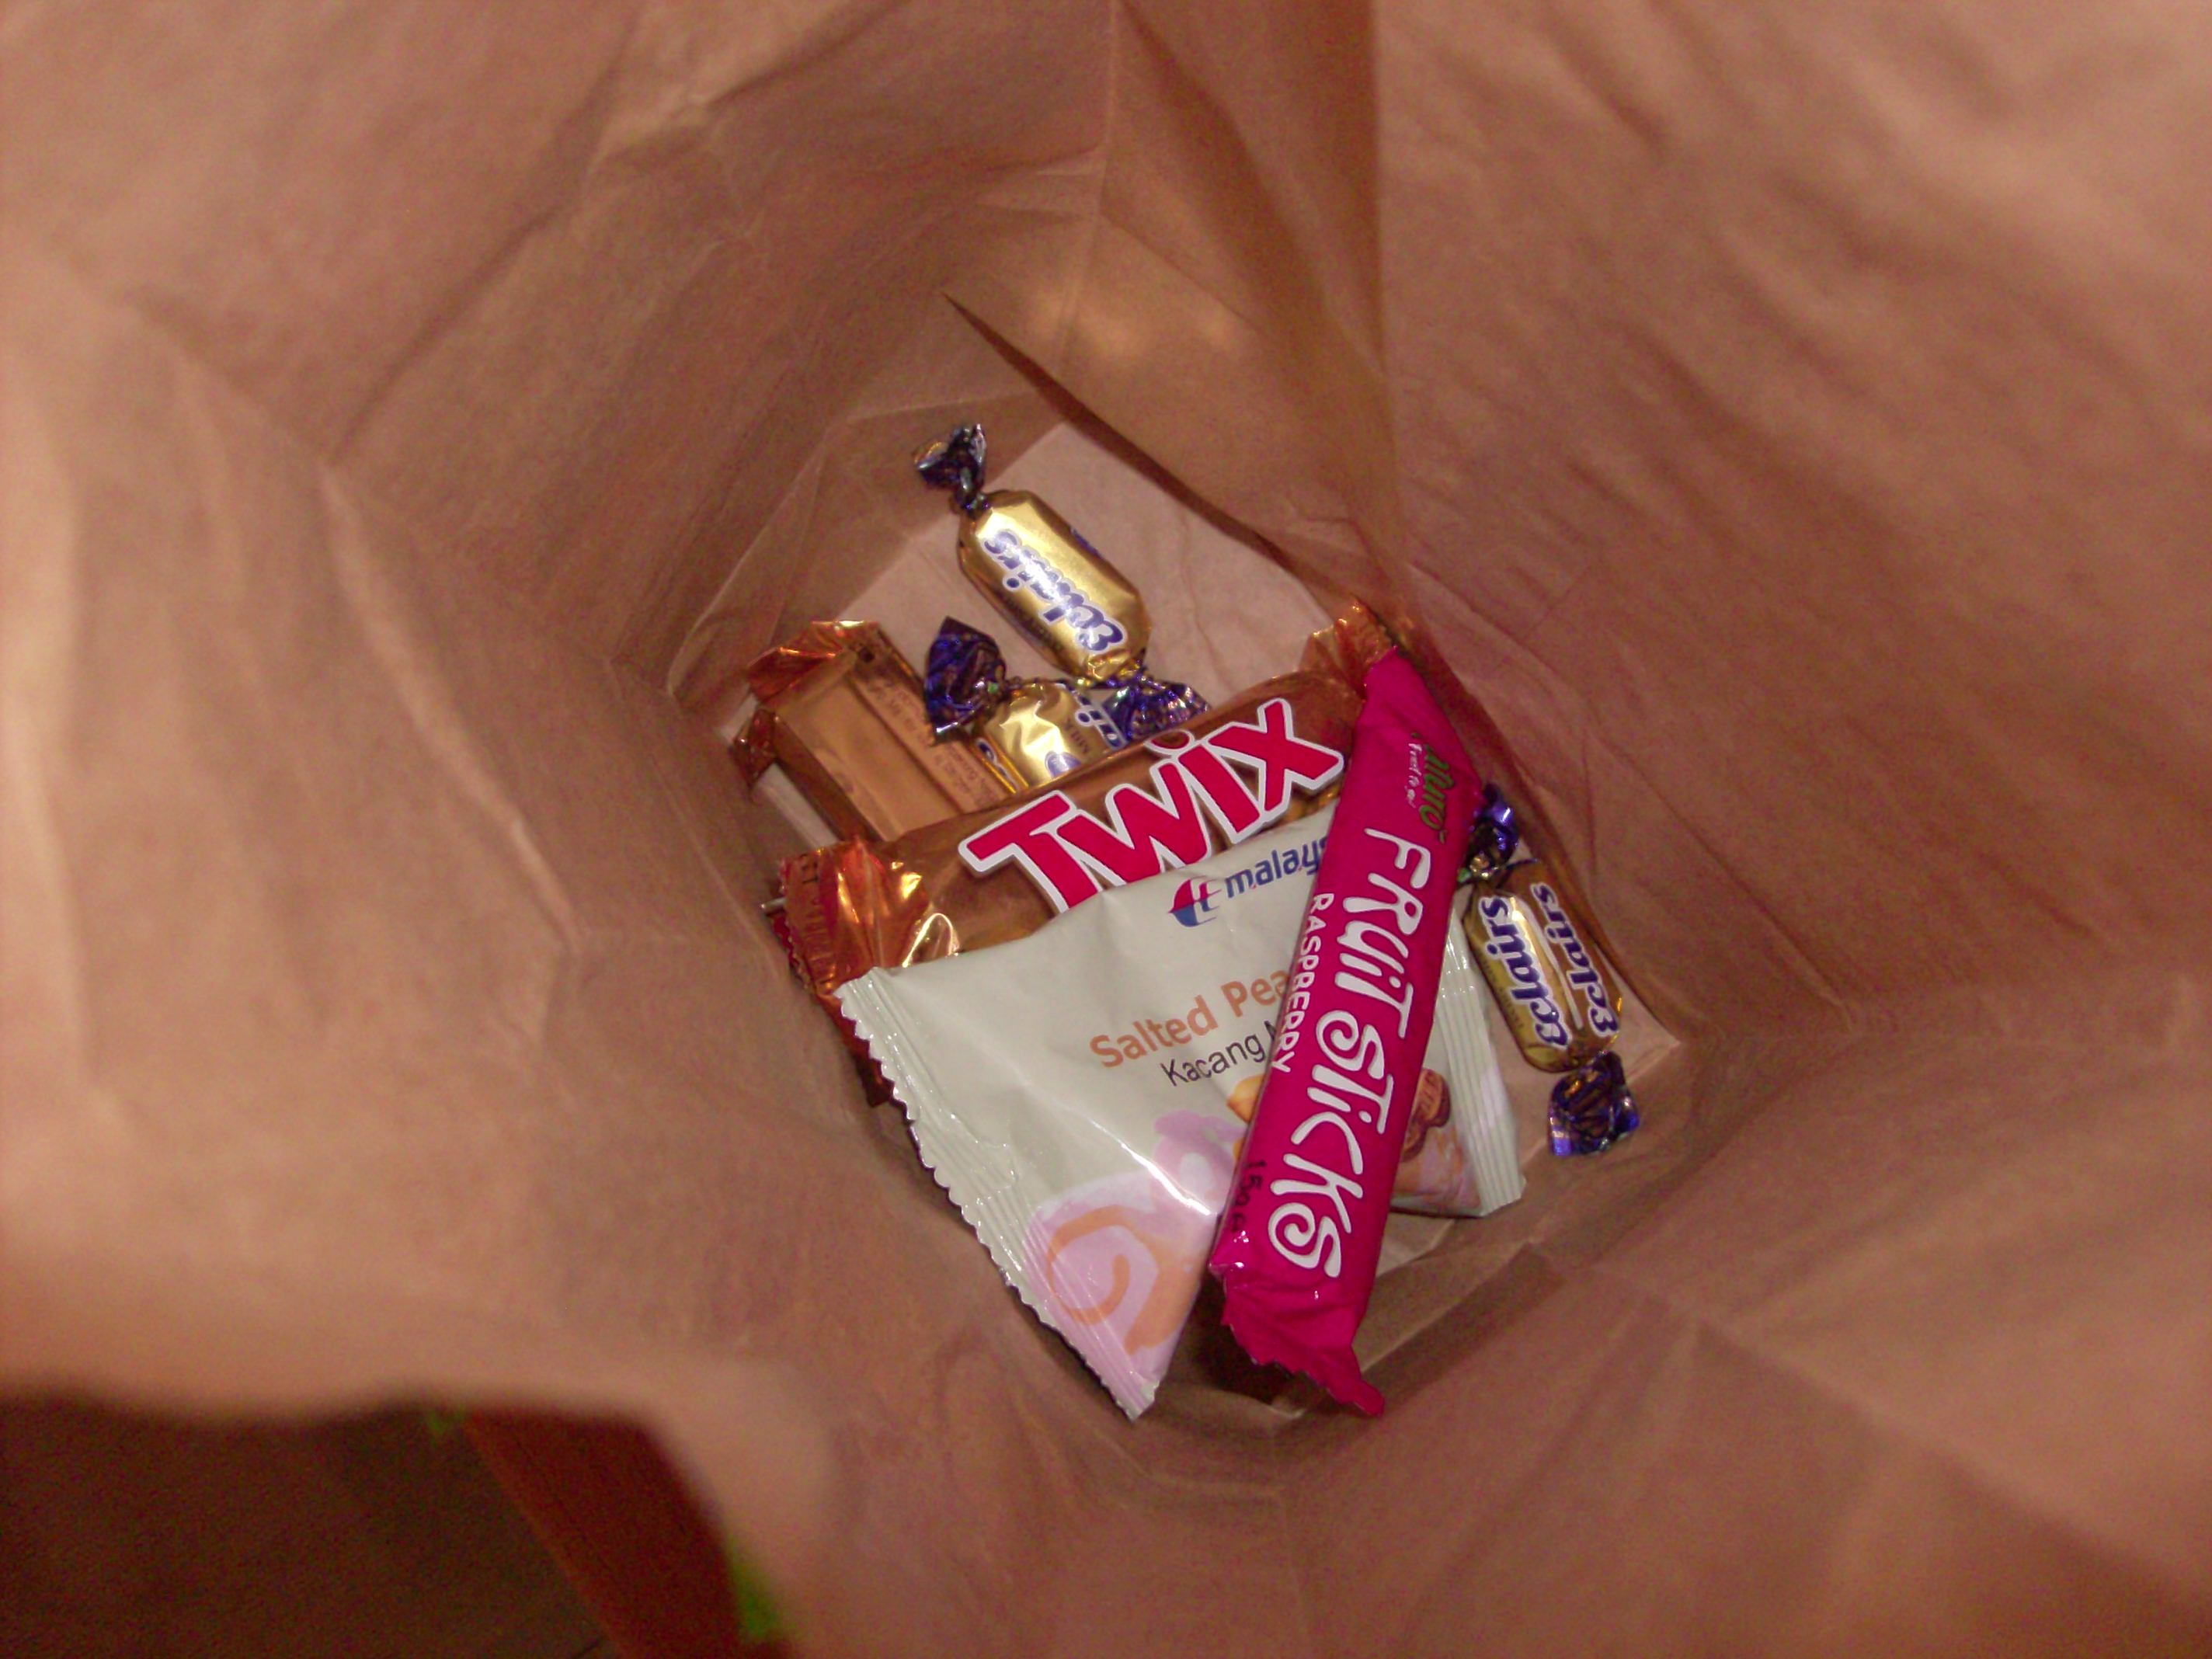
  • candy, toys, stickers etc for inside
  • 1 sheet of newspaper

Cinco de Mayo Pinata Supplies

Homemade Paper Bag Pinata Instructions

1. Cut the tissue paper into strips 1-2 inches wide and as long as the width of your paper bag.  Cut fringe on the bottom of the strips.

2. Starting at the bottom of the paper lunch sack, run a stripe of glue across the bag and attach the uncut side of the tissue paper strip.

3. Add stripes of glue and strips of fringed tissue paper as you move up the bag.  Layer the fringe over the tissue paper below so it covers the bag.

Cinco de Mayo Craft: Homemade Paper Bag Pinata

4. You don’t need to cover the bag all the way to the top.

5. Repeat for the front and back of the bag, and the sides, if desired.

Cinco de Mayo Craft: Paper Bag Pinata

6.  If you have young children, or if you are using a plastic cricket bat, I highly recommend removing the extra rectangle of paper from the bottom outside of the lunch sack.  This will help the pinata to break more easily by exposing the seal of the bag.

7.  Add candy, stickers, small toys, fruit snacks, airplane peanuts, or whatever you are using to fill your pinata.  Stuff the rest of the bag lightly with crumpled newspaper.

8.  Close your pinata tightly with a rubber band.

Fill the Pinata with candy

9. Hang your completed homemade paper bag pinata and start whacking at it!  It took a long time for us to break our pinata open, but the kids did not get tired of it.

Like I mentioned in step 6, I ended up peeling off part of the bottom of the bag and it finally busted open on the bottom.  Baby boy did not participate in making the pinata, so he was pretty amazed when he hit it and one of his favorite fruit sticks poked out of the bottom.

Cinco de Mayo Craft: Homemade Pinata

Linked at For the Kids Fridays, Link & Learn, Workshop Wednesday, and It’s Playtime.

Share
Tweet
Pin1K
1K Shares

Filed Under: Fun, Special Occasions Tagged With: kids, fun, pinata, holidays, family, cinco de mayo, crafts

« Frugal Foreigner Cost Comparison: The Cost of Being White
Sam’s Club Shopping Tips »

Comments

  1. Just Jaime says

    April 30, 2011 at 10:16 pm

    Love the simplicity!

    Reply
  2. The Activity Mom says

    May 1, 2011 at 8:35 am

    So clever! Love it! Just shared this on fb and twitter.

    Reply
  3. JillDenkins says

    May 1, 2011 at 8:40 pm

    Love it!

    Reply
  4. Karen says

    May 3, 2011 at 10:00 am

    Cute idea- we always have a pinata for the fourth of july- it would be fun for the kids to make them this year! I would love it if you shared this for Workshop Wednesday

    Reply
  5. B Fryman says

    May 4, 2011 at 8:16 am

    Visiting from Workshop Wed. Love this! We’re making this tomorrow!

    Reply
  6. B Fryman says

    May 6, 2011 at 7:49 am

    Linking to this post and your blog today!

    Reply
  7. Rachel Harwood says

    May 11, 2011 at 11:22 pm

    Oh my gosh, LOVE the little guy trying to whack the pinata! Thanks for sharing this at For the Kids Friday at SunScholars! Hope to have you back again for another fun link party later this week!

    Reply
  8. Karen says

    May 16, 2011 at 11:28 pm

    Thanks for linking to Workshop Wednesday! Hope to see you a back this week!

    Reply

Leave a Reply Cancel reply

Your email address will not be published. Required fields are marked *

Recipe Rating


About Mommysavers

Kimberly Danger established Mommysavers.com in March 2000 as a way to channel her creative energy while raising her kids. Initially an online discussion board, the website evolved into a comprehensive platform offering money-saving tips, deals and budget-friendly recipes and tips for frugal moms. Read More…

View My Blog Posts

[instagram-feed feed=1]

Tags

21 Day Fix recipes activewear Advent amazon prime christmas treat christmas treat ideas clean eating fix clean eating recipe clean eating recipes crock pot recipes copycat recipes Costco deals crafts crock pot meals date night ideas declutter decor ideas free printables frugal activities frugal recipe furniture gifts for men gratitude gymboree halloween cupcakes halloween party halloween treats healthy healthy menu plan heathy recipes holiday toys homemade christmas Instant Pot kids celebration Michael's deals oatmeal old navy deals oreos organize Shakeology starbucks stocking stuffer ideas teacher gifts turkey cupcakes walmart deals zulily

Copyright © 2025 · MommySavers.com · All Rights Reserved.