Mommysavers

Frugal Moms Living Well for Less

  • Facebook
  • Instagram
  • Food
    • Recipes
      • 5 Ingredients or Less
      • 30 Minute Meals
      • Freezer Meals
      • Appetizers
      • Breakfast
      • Lunch
      • Dinner
      • Dessert
      • Snacks
    • Cooking Techniques
    • Leftovers and Preservation
  • Home
    • Cleaning
    • Decor and Design
    • DIY Projects
    • Money
      • Couponing
      • Personal Finance
      • Shopping Tips
    • Simple Living
  • Family
    • Fun
    • Parenting
    • Travel
  • A Better You
    • Health and Fitness
    • Lifehacks
    • Fashion
    • Motivation and Productivity
    • Entrepreneurialism
  • Holidays
    • Thanksgiving
    • Christmas
    • New Year’s Eve
    • Valentine’s Day
    • St. Patrick’s Day
    • Easter
    • Mother’s Day
    • Father’s Day
    • Halloween
  • Special Deals

Puffy Tissue Paper Easter Egg Craft

April 7, 2011 by Susie Chadwick 5 Comments

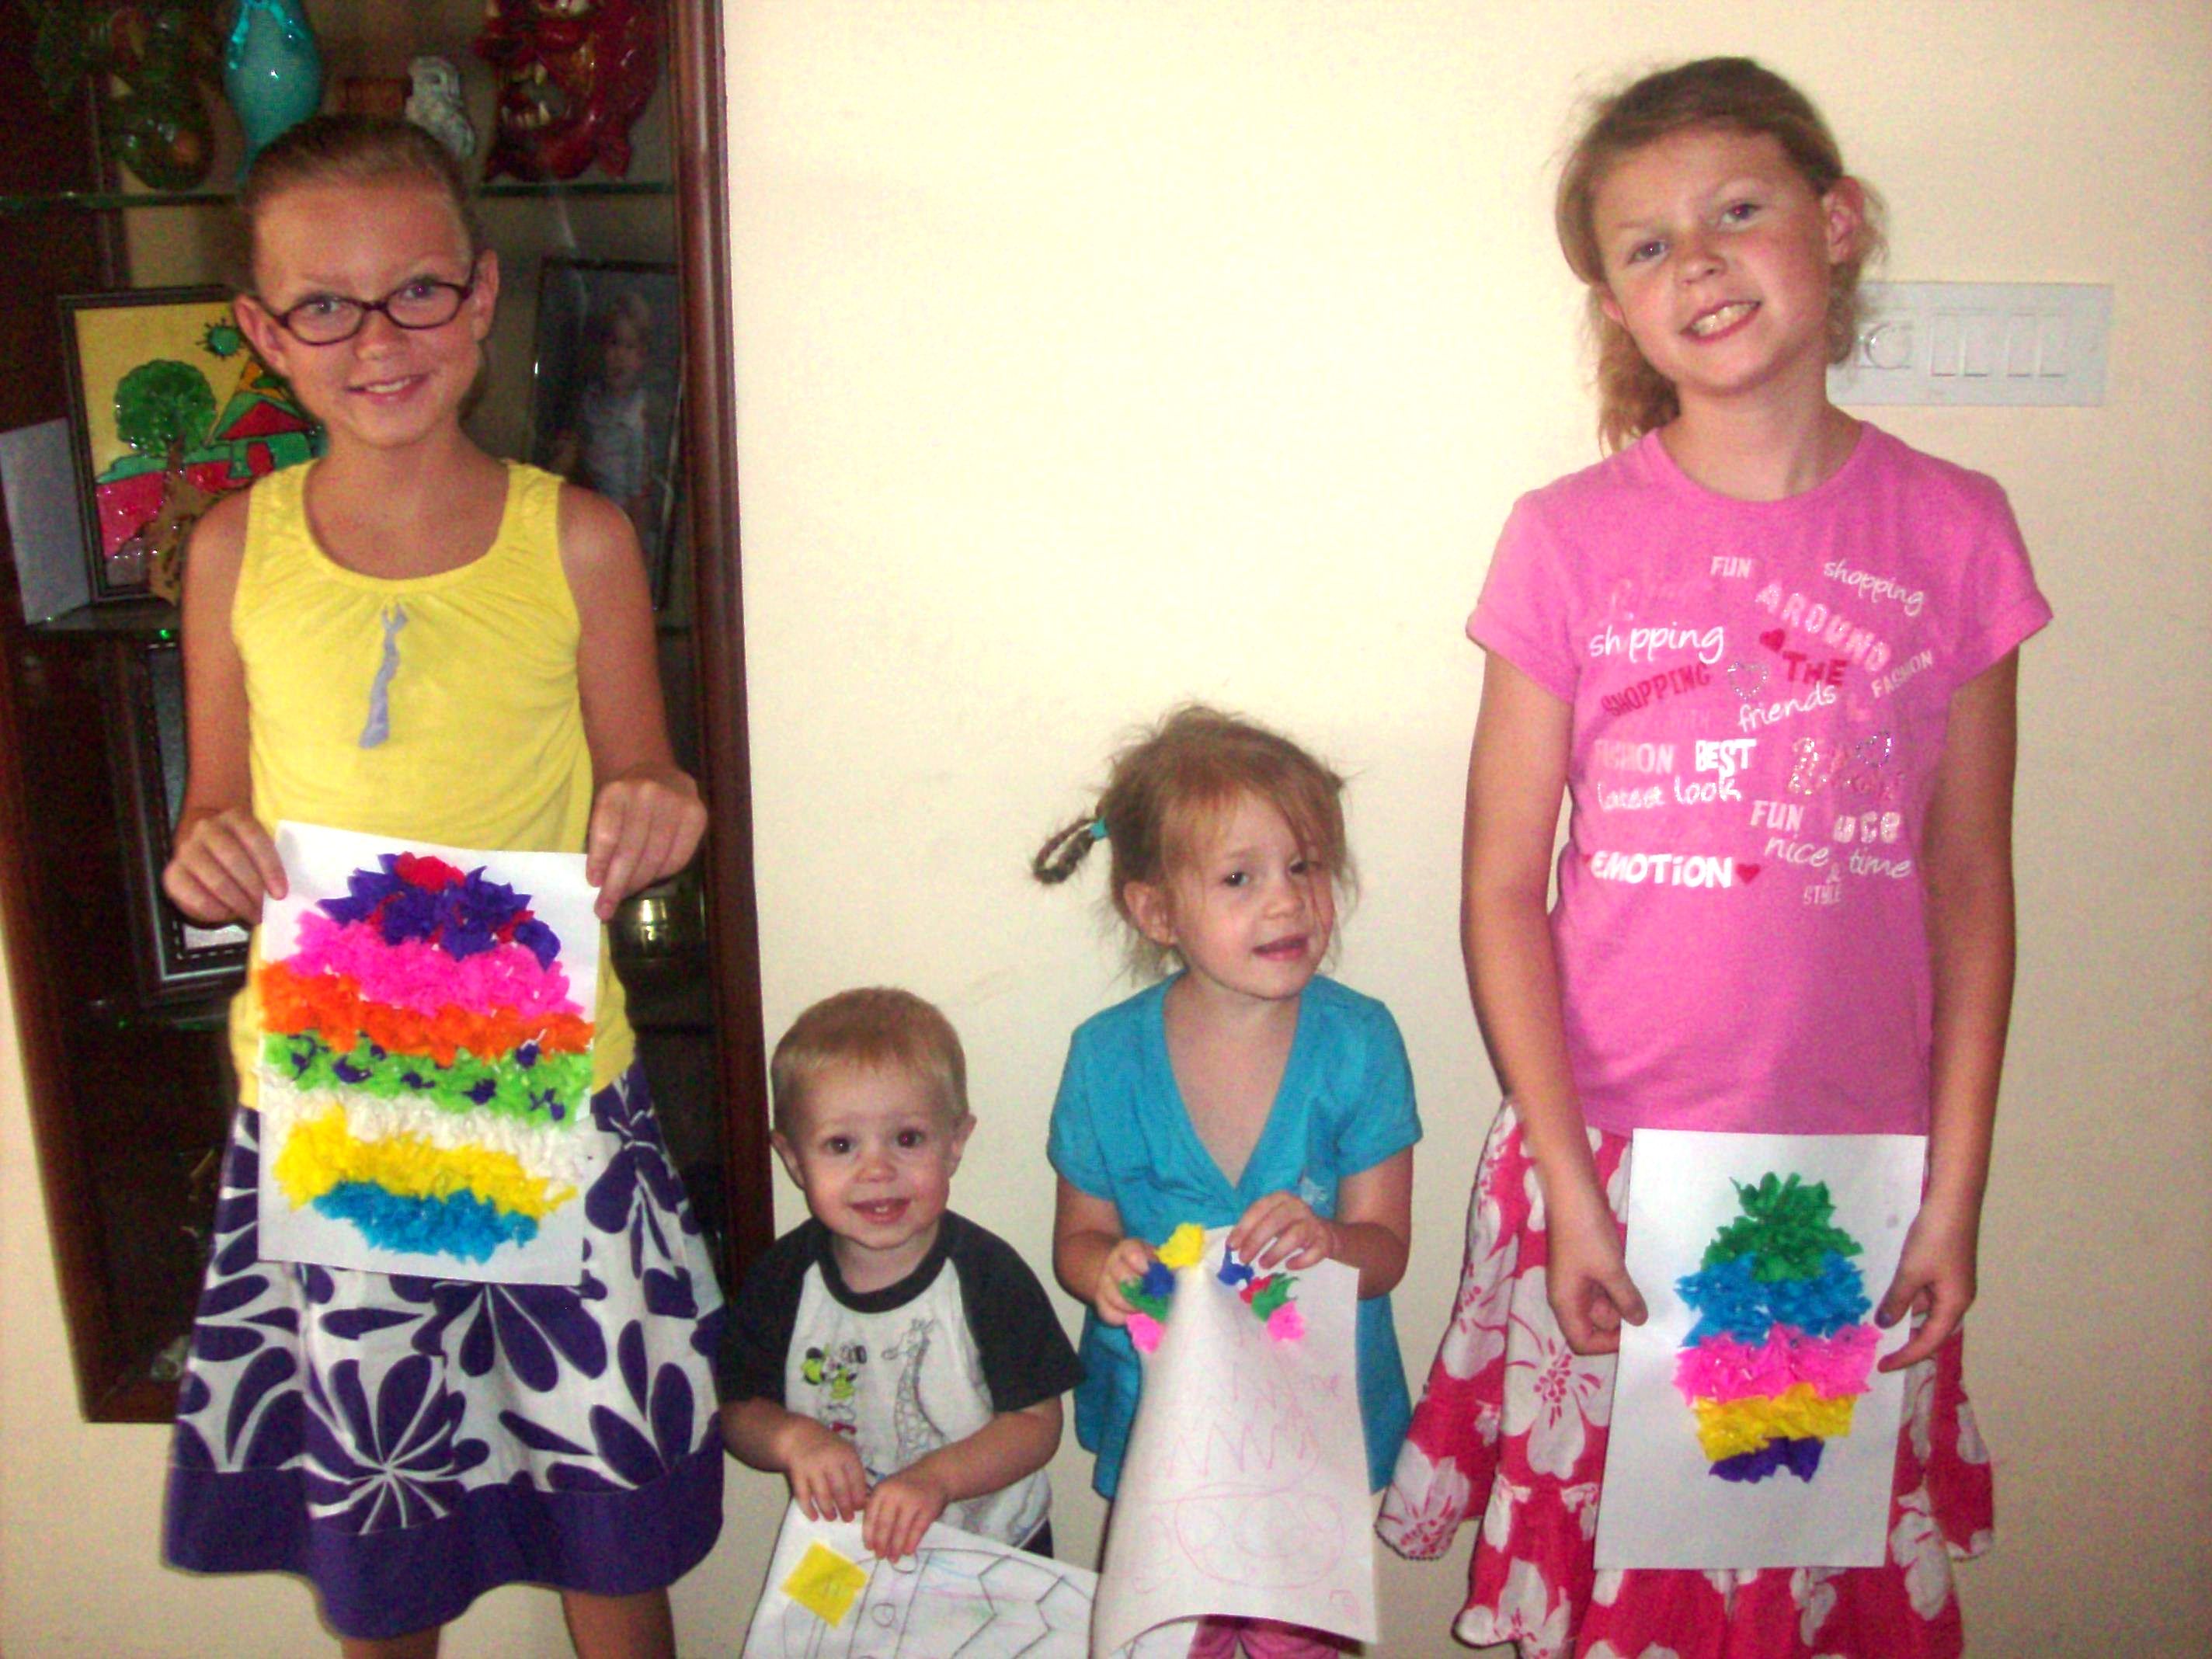
Make your own Easter decorations by decorating a paper Easter Egg with puffs of tissue paper!  This fun Easter craft can be done with kids of all ages.  We did it over Spring Break with 6 kids ranging from 1 1/2 to 11 years old and they all enjoyed it.

Puffy Easter Egg Craft Supplies

  • piece of plain paper
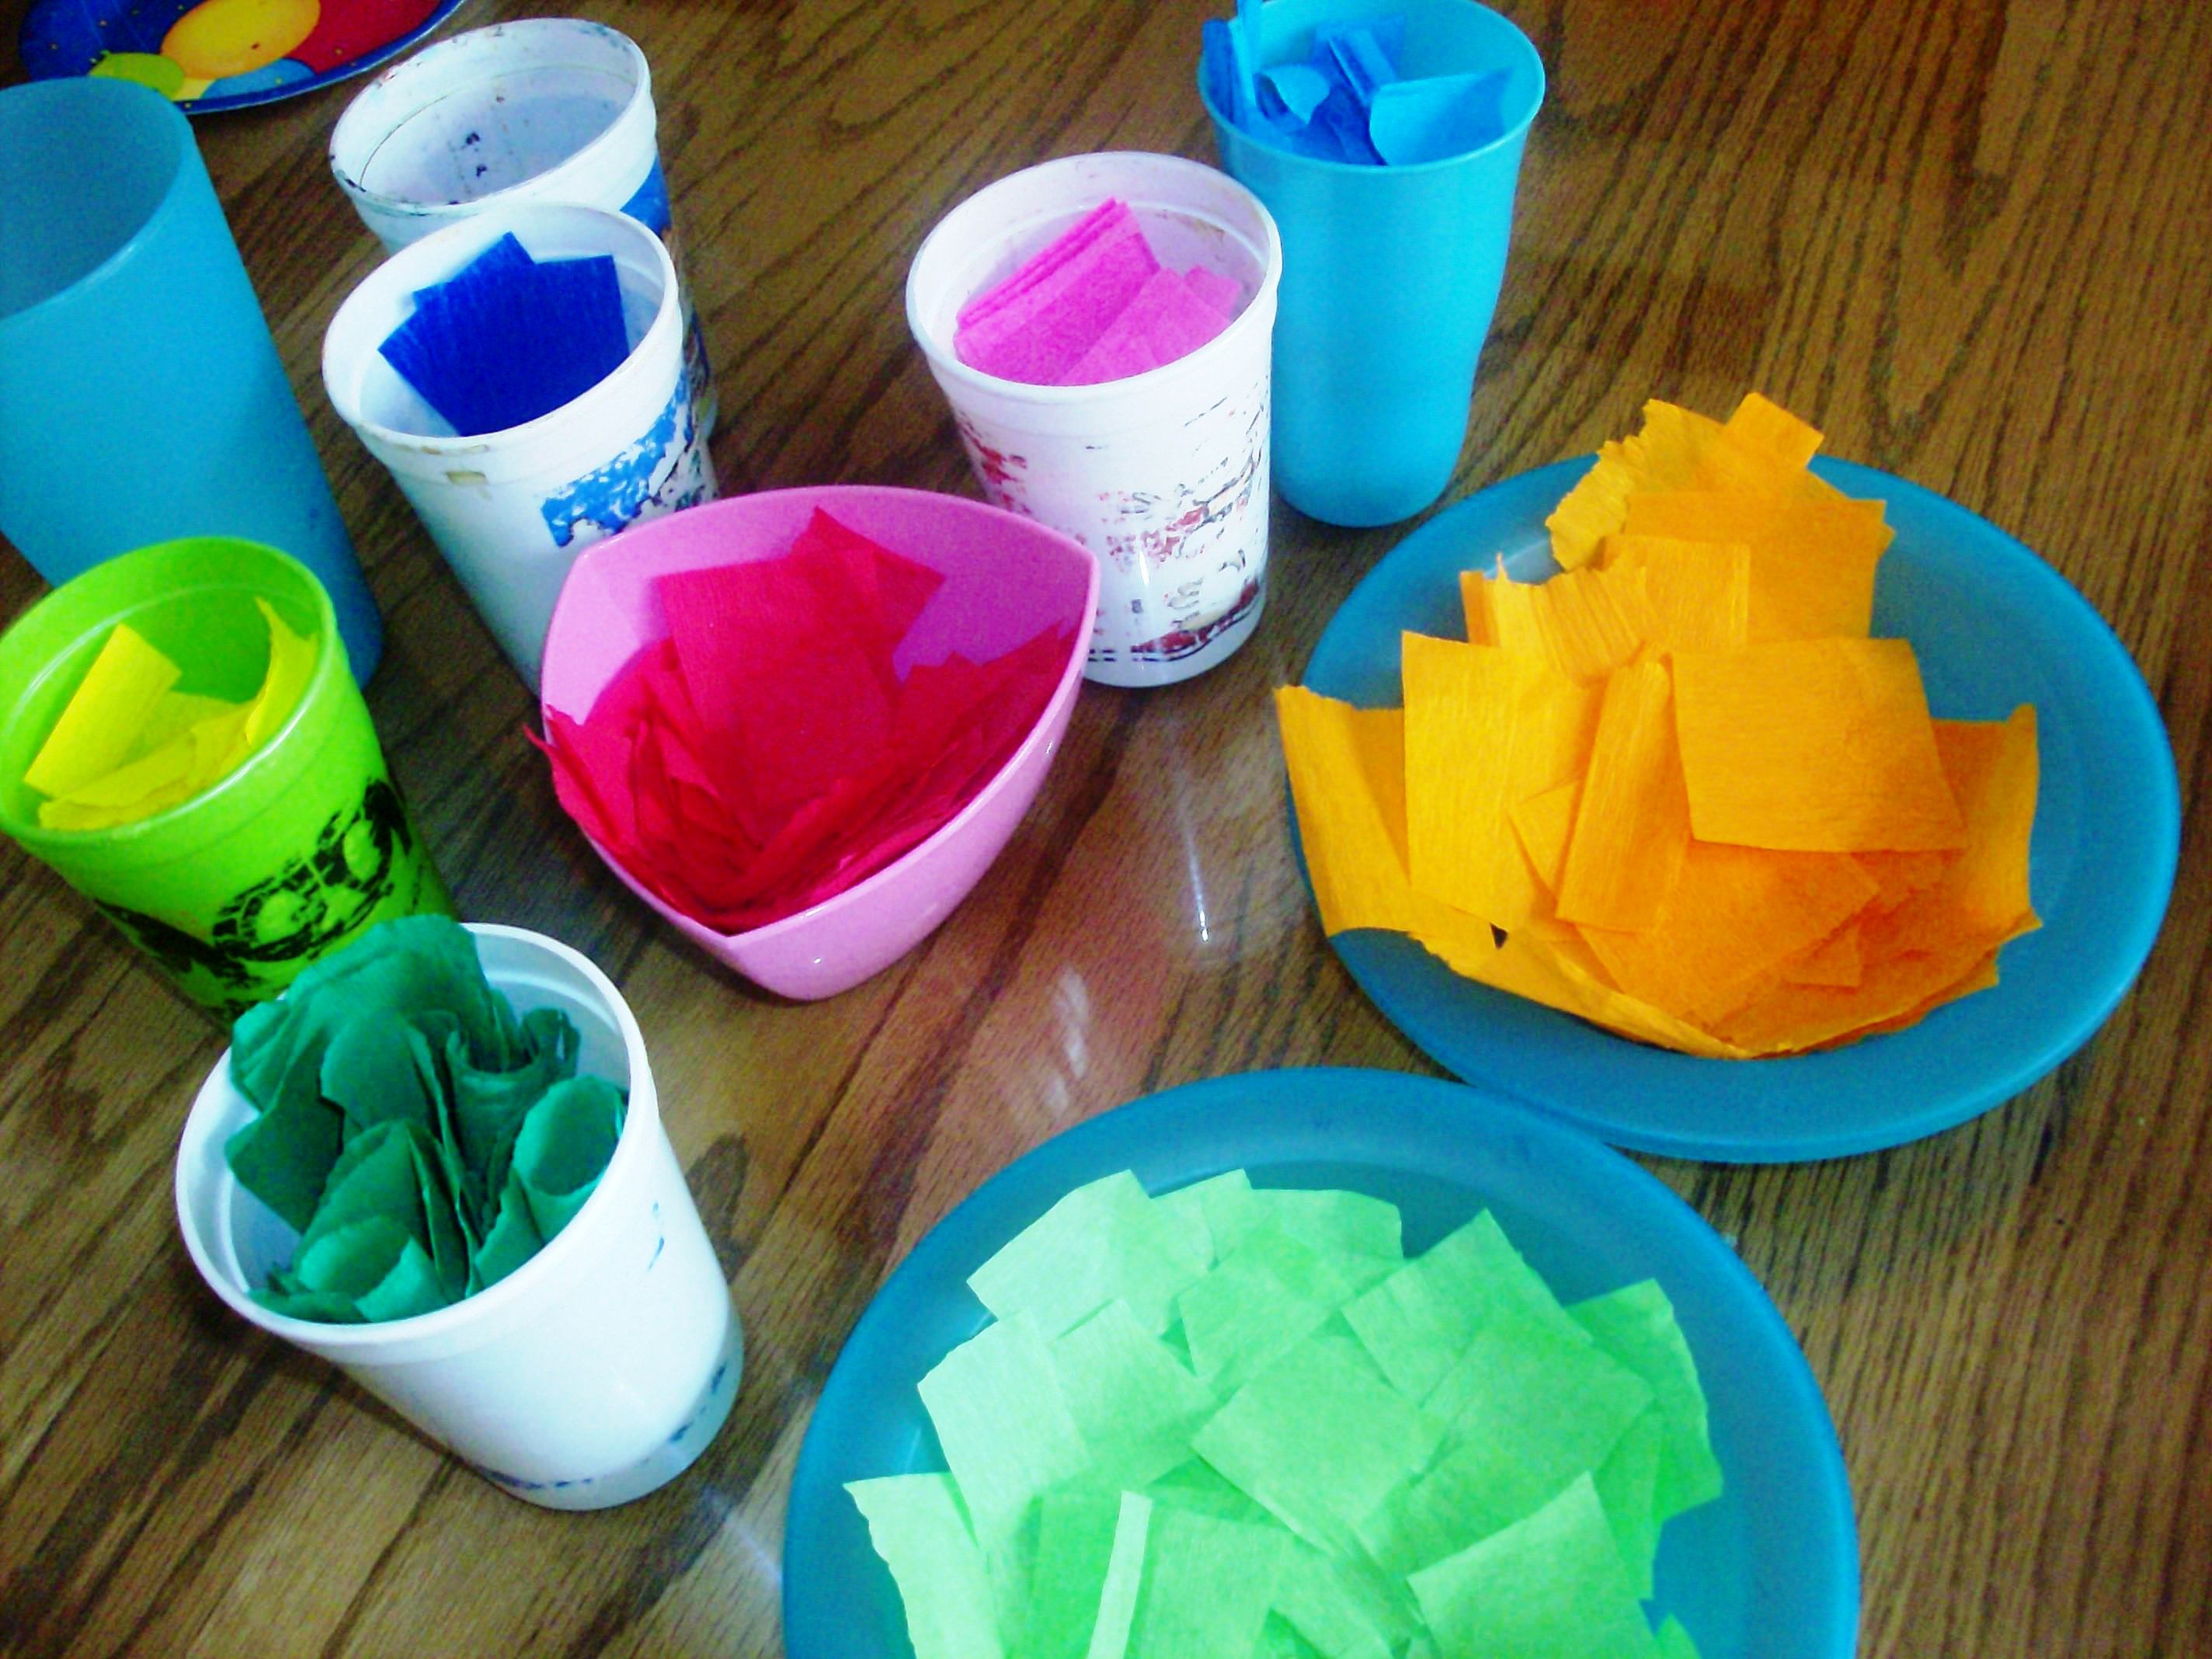
  • different colors of tissue paper cut into small squares (we are using crepe paper)
  • white glue
  • shallow container for glue
  • unsharpened pencil (or a pen or marker)
  • Time: at least 30 minutes

Instructions for Puffy Tissue Paper Easter Egg Craft

Cut the tissue paper into squares.  1.5 x 1.5″ is an ideal size, but this doesn’t have to be exact.

Draw an Easter egg on the sheet of paper.  This is one area of this craft that you can adjust for different ages.  Make the egg drawing larger and more detailed for older kids, and small and more simple for younger kids.  A larger egg will take much longer to decorate, so make sure your child has the patience for it.  My baby just colored on an egg I drew for him and was happy with that.

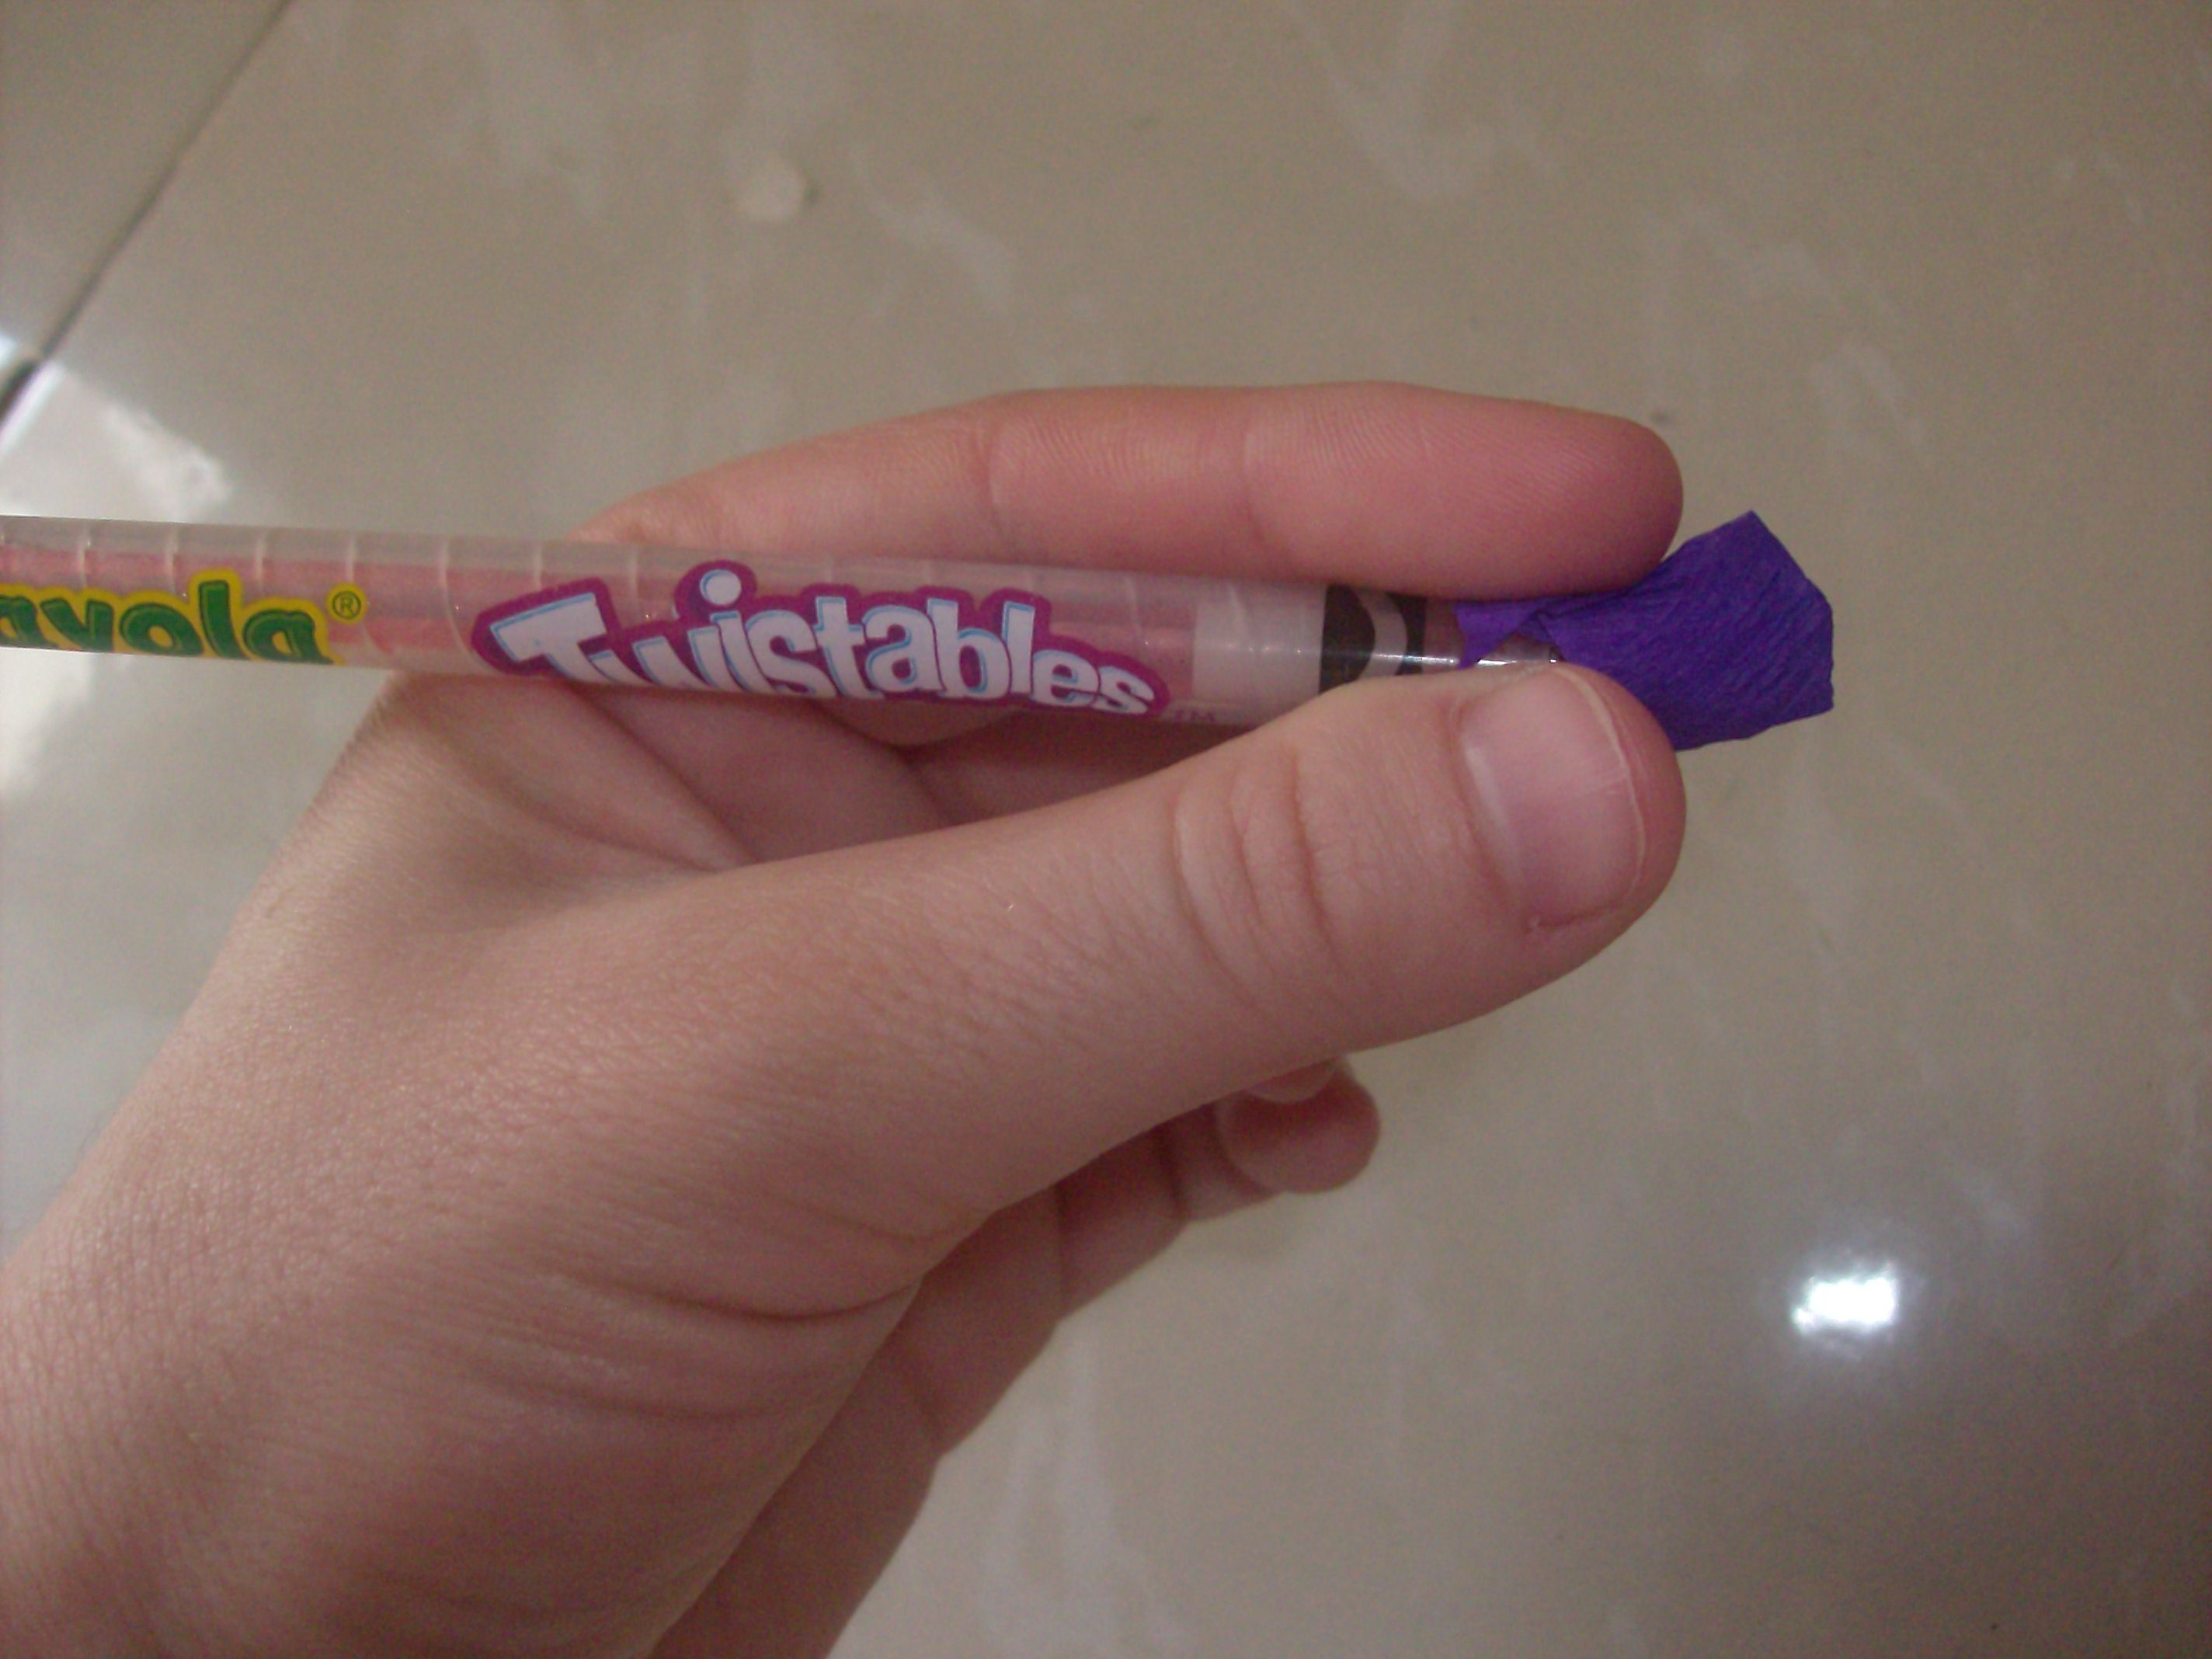
To decorate the Easter Egg with puffs of tissue paper, take one tissue paper square and wrap it around the end of a pencil.

Holding the tissue paper around the pencil, dip the end of the pencil lightly in glue and press the tissue paper onto your egg.  Release the paper and gently remove the pencil.  A puff of tissue paper remains, glued to the egg.  Repeat with different colors of tissue paper, making different patterns until your Easter egg is completely filled in and decorated.

Another way to adjust this Easter craft for different ages is to have younger children glue the tissue paper puffs farther apart. This will probably happen automatically.  Gluing them closer together gives the Easter Egg a more puffed look, but it does take a lot more time.

Also, a warning about doing this with very young kids:  The tissue paper squares are very fun to throw on the floor!

Share
Tweet
Pin198
198 Shares

Filed Under: Fun, Special Occasions Tagged With: easter, holidays, tissue paper, easter basket

« Frugal Foreigner: Buy Soap, Get Free Jewelry
Free eBook: Spring Crafts, Fun and Activities for Families »

Comments

  1. Melissa @ The Chocolate Muffin Tree says

    April 7, 2011 at 9:37 am

    Beautiful Project! They all looked like they had a lot of fun!

    Reply
  2. amber says

    April 8, 2011 at 2:47 pm

    Those are so pretty! I’m not sure we’re old enough for this one but i’m going to try to remember it for next year.

    Reply
  3. Rachel says

    April 8, 2011 at 4:22 pm

    We might have extra tissue paper lying around. I am going to have to check! I bet you can use the same thing for other “pictures too! Thanks for linkin up to It’s Playtime!

    Reply
  4. Jamie @ hands on : as we grow says

    April 8, 2011 at 9:14 pm

    I remember doing tons of tissue paper/pencil pieces of artwork as a child! I don’t think Henry’s quite ready to be doing these, though I can see him doing a tissue/crepe paper collage – without the puffiness. Someday I hope!

    Thanks for linking up to It’s Playtime this week!

    Jamie @ hands on : as we grow

    Reply
  5. Elaine says

    April 16, 2011 at 12:38 am

    This looks like a perfect craft for my kids. Great idea!

    Reply

Leave a Reply Cancel reply

Your email address will not be published. Required fields are marked *

Recipe Rating


About Mommysavers

Kimberly Danger established Mommysavers.com in March 2000 as a way to channel her creative energy while raising her kids. Initially an online discussion board, the website evolved into a comprehensive platform offering money-saving tips, deals and budget-friendly recipes and tips for frugal moms. Read More…

View My Blog Posts

[instagram-feed feed=1]

Tags

21 Day Fix recipes activewear Advent amazon prime christmas treat christmas treat ideas clean eating fix clean eating recipe clean eating recipes crock pot recipes copycat recipes Costco deals crafts crock pot meals date night ideas declutter decor ideas free printables frugal activities frugal recipe furniture gifts for men gratitude gymboree halloween cupcakes halloween party halloween treats healthy healthy menu plan heathy recipes holiday toys homemade christmas Instant Pot kids celebration Michael's deals oatmeal old navy deals oreos organize Shakeology starbucks stocking stuffer ideas teacher gifts turkey cupcakes walmart deals zulily

Copyright © 2025 · MommySavers.com · All Rights Reserved.